Does Java Rest Template Call Wait for Response Before Continueing
Update note: Subhrajyoti Sen updated this tutorial to use a working API. Subhrajyoti Sen also wrote the original tutorial.
MockWebServer is a library from Square, the people who made Retrofit and OkHttp. MockWebServer allows you to easily test how your apps behave when making HTTP/HTTPS calls.
A mock web server is a program that simulates the behavior of an actual remote server but doesn't make calls over the internet. This makes it easy to test scenarios without internet access and without having to alter your remote server.
In this tutorial, you'll learn:
- The benefits of using a mock server while testing.
- How to set up MockWebServer.
- How to make MockWebServer mock the behavior of your actual server.
- How to write UI tests to make sure your app functions as expected.
You'll do this by working on a What's The Meme app, which displays a list of popular meme templates and their names.
Getting Started
Download the starter project by using the Download Materials button at the top or bottom of the tutorial.
You'll find a starter project and a final project inside the materials.
Some of the files in the starter project are:
- MemeAdapter.kt: A RecyclerView adapter that displays the list of memes.
- MemeModel.kt: A Kotlin data model that represents each meme.
- MainActivity.kt: Displays the list and the error states, when required.
- MainViewModel.kt: Interacts with
MemeRepositoryand emits state toMainActivity. - OkHttpProvider.kt: Contains a helper method to access a networking client.
- MemeApi.kt: Contains a method corresponding to the API call you want to make.
In this tutorial, you'll focus less on the code from the files above and more on setting up MockWebServer and writing tests.
Open Android Studio and select Open an existing Android Studio project. Select starter from the materials folder.

After you've imported the starter project, build and run. You'll see a screen like this:

Why Use a Mock Server to Test API Calls?
Before setting up your MockWebServer, you might wonder why you'd want to test your API calls.
Doing this provides a few advantages:
- Testing Adapters Is Easy
- Testing Empty and Error States
Sometimes, the API might give responses that aren't straightforward to serialize and deserialize directly. In other cases, you might want to convert the data from your API response from one data type to another. For example, the API might return dates as Strings, but you want to use them as DateTime objects.
For such cases, you might write an adapter to convert the data. A mock web server makes it easy to test whether these adapters are working as expected when making API calls.
It can be tricky to test whether apps handle empty and error states properly when dealing with a remote server. Servers are designed to be as reliable as possible, making it challenging to get error responses while testing. Using a mock server lets you easily emulate error responses and see if the app handles them correctly without changing your actual server.
Why Use MockWebServer Over Manual Client Mocking?
Now that you're sold on testing your API calls, you might wonder why you should use MockWebServer when you could just mock out whatever class makes your API calls. Here are a few reasons:
- MockWebServer exercises the full HTTP stack, which would be tedious to do manually.
- You don't need to make changes on the app side when using a MockWebServer.
- It's easy to recreate edge-cases such as throttling and rare error codes.
Configuring MockWebServer
In this section, you'll save a response to a JSON file and configure a MockWebServer instance to return the saved response.
Changing the API URL
The base URL for the app is stored in MemeApp. Open MemeApp.kt and look for the following function:
open fun getBaseUrl() = "https://api.imgflip.com" When you create a test with a mock server, the app shouldn't use the real URL. Instead, it should use the mock server's URL. To set this up, you'll need a mechanism to tell the app to use the real URL usually but the mock URL when you run tests.
A test runner makes this possible. It helps you configure the conditions you use to run your tests.
First, you must create an equivalent of MemeApp that returns the mock URL instead of the real URL.
Do this by creating a file in the androidTest folder and naming it MemeTestApp.kt. Add the following code to it:
package com.company.android.whatsthememe class MemeTestApp : MemeApp() { var url = "http://127.0.0.1:8080" override fun getBaseUrl(): String { return url } } Here, http://127.0.0.1 is the local URL of your computer and 8080 is the port MockWebServer will use.
After you add the MemeTestApp.kt file, your package structure should look like this:

Creating a Test Runner
Now, you need to provide a test runner that uses MemeTestApp instead of MemeApp when running a test.
Create a file in the androidTest folder and name it MockTestRunner.kt. Add the following code to it:
package com.company.android.whatsthememe import android.app.Application import android.content.Context import androidx.test.runner.AndroidJUnitRunner class MockTestRunner : AndroidJUnitRunner() { override fun newApplication(cl: ClassLoader?, className: String?, context: Context?): Application { return super.newApplication(cl, MemeTestApp::class.java.name, context) } } newApplication() provides the application instance you'll use in the test. You can see it returns an application instance using MemeTestApp instead of MemeApp.
Now that you've written a test runner, you need to tell Gradle to use it for your project. To do this, open the app-level build.gradle and change the value of testInstrumentationRunner as follows:
testInstrumentationRunner "com.company.android.whatsthememe.MockTestRunner" Click Sync Now and let Gradle finish syncing. From now on, Gradle will use MockTestRunner whenever you run any UI tests.
To use a mock web server and verify that it's working as expected, you'll write a few Espresso tests next.
Using Espresso
Espresso is a testing framework that Android provides to write UI tests. It allows you to emulate user interactions while running tests and verify if your views respond as expected.
You can test MockWebServer even without Espresso. But this tutorial uses it to demonstrate a complete testing scenario.
Note: If you're new to UI testing using Espresso, check out this introduction to Espresso tutorial.
Before starting to write the test, it's helpful to review the contents of activity_main.xml. It contains three main views:
- ProgressBar: Displays the loading status.
- TextView: Shows the error message.
- RecyclerView: Displays the list of characters.
Create a file MainActivityTest.kt in the androidTest folder and add this to it:
package com.company.android.whatsthememe import androidx.test.ext.junit.runners.AndroidJUnit4 import org.junit.After import org.junit.Before import org.junit.runner.RunWith @RunWith(AndroidJUnit4::class) class MainActivityTest { @Before fun setup() { } @After fun teardown() { } } This is the basic structure of an Espresso test. You annotate a class with @RunWith(AndroidJUnit4::class) to specify that AndroidJUnit4 is the runner for this test.
A Before annotation on a method specifies that the method will run before every test. Any method with @After will run after every test. Use these annotations to keep initialization logic common to all tests.
Setting up MockWebServer
You'll need to add the Gradle dependency for MockWebServer first to use instances of MockWebServer. Open the app-level build.gradle and add the following line below the corresponding // TODO 2 at the end of the file:
androidTestImplementation "com.squareup.okhttp3:mockwebserver:4.9.3" Click Sync Now and let Gradle finish syncing.
Next, you'll create an instance of MockWebServer. Add the following line before setup() in MainActivityTest.kt:
private val mockWebServer = MockWebServer() Place the cursor on the word MockWebServer and press Alt-Enter on Windows or Option-Return on Mac. Then, choose Import to automatically add the missing import line and fix the build.
You have to start the server before every test and stop it after every test. You can do this by modifying setup() as follows:
@Before fun setup() { mockWebServer.start(8080) } This starts the mock server on the 8080 port.
Next, modify teardown() to stop the server:
@After fun teardown() { mockWebServer.shutdown() } And that's all it takes to get MockWebServer ready. All you need to do now is to set up some mock responses and write some tests.
Setting up a Mock Response
Before writing your tests, you must define the response your mock web server will return. To find the structure of the Imgflip API's response, you need to make a real API call first.
Creating a JSON Response
Open a web browser and paste the following URL: https://api.imgflip.com/get_memes.
The response will be in the following format:
{ "success": true, "data": { "memes": [ { "id": "181913649", "name": "Drake Hotline Bling", "url": "https://i.imgflip.com/30b1gx.jpg", "width": 1200, "height": 1200, "box_count": 2 },... ] } } Keep the browser open; you'll need it later.
If it doesn't already exist, create a directory named assets in your app module. It'll look something like this:

Create a file in the assets directory and name it success_response.json. This file will contain the response the mock server will return.
Switch to your browser, copy the first eight items from the response and paste them into this file. Now, your success_response.json file looks something like this:
{ "success": true, "data": { "memes": [ { "id": "181913649", "name": "Drake Hotline Bling", "url": "https://i.imgflip.com/30b1gx.jpg", "width": 1200, "height": 1200, "box_count": 2 }, { "id": "87743020", "name": "Two Buttons", "url": "https://i.imgflip.com/1g8my4.jpg", "width": 600, "height": 908, "box_count": 3 }, { "id": "112126428", "name": "Distracted Boyfriend", "url": "https://i.imgflip.com/1ur9b0.jpg", "width": 1200, "height": 800, "box_count": 3 }, { "id": "131087935", "name": "Running Away Balloon", "url": "https://i.imgflip.com/261o3j.jpg", "width": 761, "height": 1024, "box_count": 5 }, { "id": "247375501", "name": "Buff Doge vs. Cheems", "url": "https://i.imgflip.com/43a45p.png", "width": 937, "height": 720, "box_count": 4 }, { "id": "124822590", "name": "Left Exit 12 Off Ramp", "url": "https://i.imgflip.com/22bdq6.jpg", "width": 804, "height": 767, "box_count": 3 }, { "id": "129242436", "name": "Change My Mind", "url": "https://i.imgflip.com/24y43o.jpg", "width": 482, "height": 361, "box_count": 2 }, { "id": "217743513", "name": "UNO Draw 25 Cards", "url": "https://i.imgflip.com/3lmzyx.jpg", "width": 500, "height": 494, "box_count": 2 } ] } } Remember to remove the last comma and add the brackets "]}}" at the end of the file to make sure it's a valid JSON file.
Creating a File Reader to Read the Response
MockWebServer can't read the response from the JSON file directly. For this, you need to create a file reader to read the contents of the JSON file and convert them into a String.
Start by creating a file in androidTest and naming it FileReader.kt.
Add the following code to FileReader.kt:
package com.company.android.whatsthememe import androidx.test.platform.app.InstrumentationRegistry import java.io.IOException import java.io.InputStreamReader object FileReader { fun readStringFromFile(fileName: String): String { try { val inputStream = (InstrumentationRegistry.getInstrumentation().targetContext .applicationContext as MemeTestApp).assets.open(fileName) val builder = StringBuilder() val reader = InputStreamReader(inputStream, "UTF-8") reader.readLines().forEach { builder.append(it) } return builder.toString() } catch (e: IOException) { throw e } } } FileReader consists of a single method: readStringFromFile(). This opens the JSON file as an InputStream and writes its contents in a String line by line. The final, built-up String is then returned. You'll use FileReader to read from the success_response.json file you created earlier.
Writing the Tests
Now that you've fully set up the mock server, you'll write a few Espresso tests to ensure the server is working as expected. But you must do one last thing before writing the tests.
API calls are asynchronous tasks, so you need a way to tell Espresso to wait for the API calls to complete. You'll use an idling resource to solve this.
Setting up an Idling Resource
An idling resource represents an asynchronous operation whose results affect subsequent operations in a UI test. You can read more about idling resources in the Espresso documentation.
Open the app-level build.gradle and add the following line below the corresponding // TODO 3 at the end of the file:
androidTestImplementation 'com.jakewharton.espresso:okhttp3-idling-resource:1.0.0' This adds the Gradle dependency, which you need to have before you can call OkHttp3IdlingResource.
Now, click Sync Now and let Gradle finish syncing.
Open MainActivityTest.kt and add a member variable for OkHttp3IdlingResource just below the mockWebServer one, as follows:
private lateinit var okHttp3IdlingResource: OkHttp3IdlingResource Next, add the following lines to the beginning of setup() to set up and register the idling resource just before starting the mockWebServer:
@Before fun setup() { okHttp3IdlingResource = OkHttp3IdlingResource.create( "okhttp", OkHttpProvider.getOkHttpClient() ) IdlingRegistry.getInstance().register( okHttp3IdlingResource ) mockWebServer.start(8080) } Place the cursor on the words IdlingRegistry and OkHttp3IdlingResource, respectively, then press Alt-Enter or Option-Return. Next, choose Import to automatically add the missing import lines and fix the build.
OkHttp3IdlingResource is a class that the okhttp-idling-resource library provides. It tells Espresso to wait for the OkHttp client to finish performing its task. OkHttp is the networking client used in the project.
OkHttpProvider is a helper class in the project that gives you access to a static OkHttp instance.
Every time you register an idling resource, you also have to unregister it. Add the following code at the end of teardown(), just after shutting down the mockWebServer:
IdlingRegistry.getInstance().unregister(okHttp3IdlingResource) For your next step, you'll test to see what happens when the case is successful.
Testing a Successful Case
For your first test case, you'll make MockWebServer return the response from the JSON file. You can tell MockWebServer what to send as a response by creating a dispatcher.
Add the following method to the MainActivityTest.kt class and import dependencies:
@Test fun testSuccessfulResponse() { mockWebServer.dispatcher = object : Dispatcher() { override fun dispatch(request: RecordedRequest): MockResponse { return MockResponse() .setResponseCode(200) .setBody(FileReader.readStringFromFile("success_response.json")) } } } Here's what's happening with this code:
@Test tells Espresso the method contains a test. MockResponse() creates a mock response the mock server will return. setResponseCode() specifies the response code.
Because you're mocking a successful response, the code is 200. setBody() contains the body of the response. In this case, you use FileReader to convert the JSON response into a String instance.
With the mock server set up, you need to write the UI test to run to verify the successful response.
In this case, the MockWebServer returns the response almost immediately, and you might not need an idling resource for the test to work. But it's recommended to use an idling resource when a test depends on an asynchronous operation. Ensuring the test conditions are checked only after the asynchronous operation is completed reduces test flakiness.
Add the following at the end of testSuccessfulResponse() and import dependencies:
val scenario = launchActivity<MainActivity>() onView(withId(R.id.progress_bar)) .check(matches(withEffectiveVisibility(ViewMatchers.Visibility.GONE))) onView(withId(R.id.meme_recyclerview)) .check(matches(withEffectiveVisibility(ViewMatchers.Visibility.VISIBLE))) onView(withId(R.id.textview)) .check(matches(withEffectiveVisibility(ViewMatchers.Visibility.GONE))) scenario.close() The code above launches the Activity and verifies the that following conditions are met after a successful response:
- The view with
R.id.progress_barhas a visibility ofView.GONE. - The one with
R.id.meme_recyclerviewhas a visibility ofView.VISIBLE. - The view with
R.id.textviewhas a visibility ofView.GONE.
Run the test by clicking the Play icon next to the class definition and then selecting Run MainActivityTest.
Once the app launches on your device, Android Studio shows you a green check mark indicating the successful test.

Now, it's time to see what happens when you get a failed response.
Testing a Failed Response
For this test, you'll create a response that returns after five seconds. You've configured the app to request timeout after three seconds so it will treat a five-second response as a failure.
Add the following method to MainActivityTest.kt and import dependencies:
@Test fun testFailedResponse() { mockWebServer.dispatcher = object : Dispatcher() { override fun dispatch(request: RecordedRequest): MockResponse { return MockResponse() .setResponseCode(200) .setBody(FileReader.readStringFromFile("success_response.json")) .throttleBody(1024, 5, TimeUnit.SECONDS) } } val scenario = launchActivity<MainActivity>() onView(withId(R.id.progress_bar)) .check(matches(withEffectiveVisibility(ViewMatchers.Visibility.GONE))) onView(withId(R.id.meme_recyclerview)) .check(matches(withEffectiveVisibility(ViewMatchers.Visibility.GONE))) onView(withId(R.id.textview)) .check(matches(withEffectiveVisibility(ViewMatchers.Visibility.VISIBLE))) onView(withId(R.id.textview)) .check(matches(withText(R.string.something_went_wrong))) scenario.close() } In the code above, throttleBody() throttles the response by five seconds. This test verifies one extra thing: It checks whether the view with ID R.id.textview contains the text that the string resource R.string.something_went_wrong refers to.
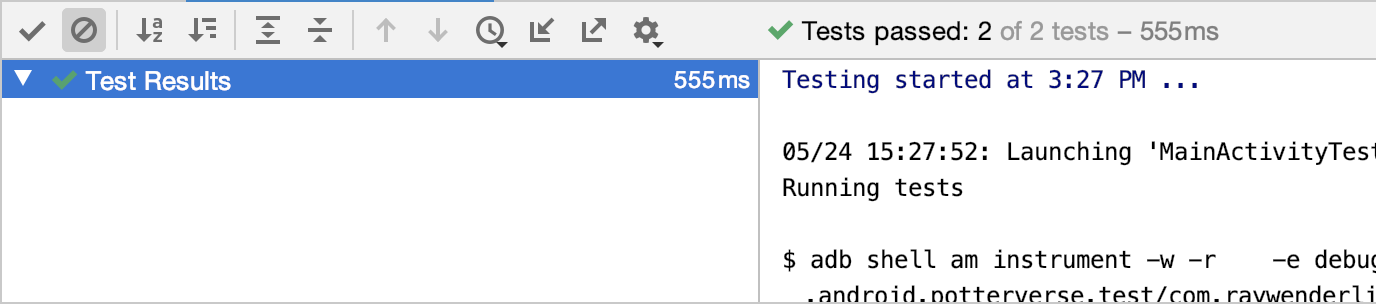
Run MainActivityTest. You'll see that both tests pass.
Congratulations! You've now set up tests to check your app's success and failure responses on a mock web server.
Where to Go From Here?
Download the final project by using the Download Materials button at the top or bottom of this tutorial.
In this tutorial, you've set up MockWebServer, configured it to mock API calls from a remote server and written UI tests to verify how an app functions.
As a further enhancement, make the app display a text saying Oops! Seems like a server error when the API returns a status code of 500. Configure MockWebServer to return a 500 status code and write a UI test to verify that the app displays the text.
To learn more about MockWebServer, refer to the documentation on the MockWebServer repository.
Hopefully, you've enjoyed this tutorial! If you have any questions or ideas to share, please join the forum discussion below.
Source: https://www.raywenderlich.com/33855511-testing-rest-apis-using-mockwebserver
0 Response to "Does Java Rest Template Call Wait for Response Before Continueing"
Post a Comment